
PRIME Member Modules
Module that accessible to PRIME Member
Property list
Objective: To view My Properties page.
Step 1
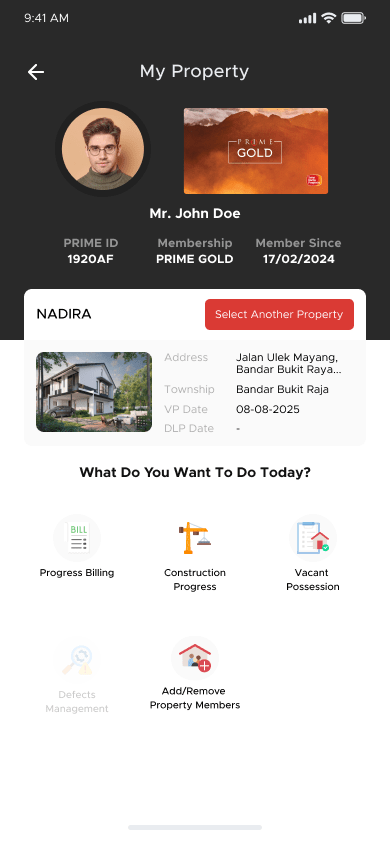
From the homepage, under Quick Access menu, click the “My Property”
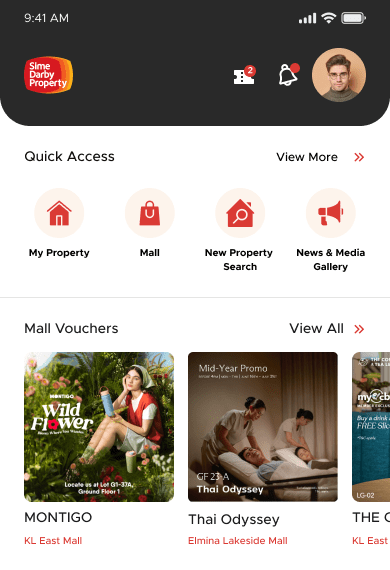
a. User will be able go to the My Property page
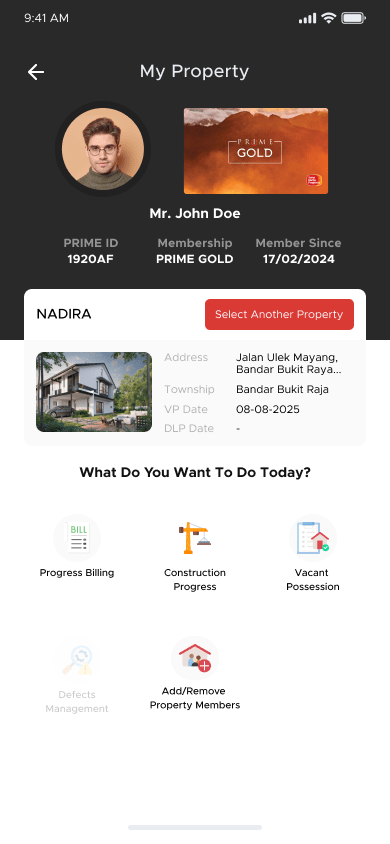
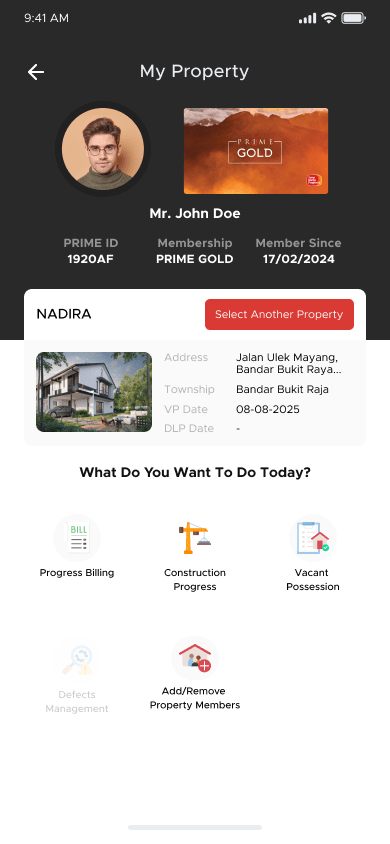
b. At the My Property page, user can access to the:
- Property Owned
- Progress billing
- Construction Progress
- Vacant Possession
- Defect management
- Request Support
- Add/Remove Property Members
Step 2
Click “Select Another Property” to view the list and select the property owned
a. Click “Select Property” button to select the property
Progress Billing
Objective: To view Progress Billing Page.
Step 1
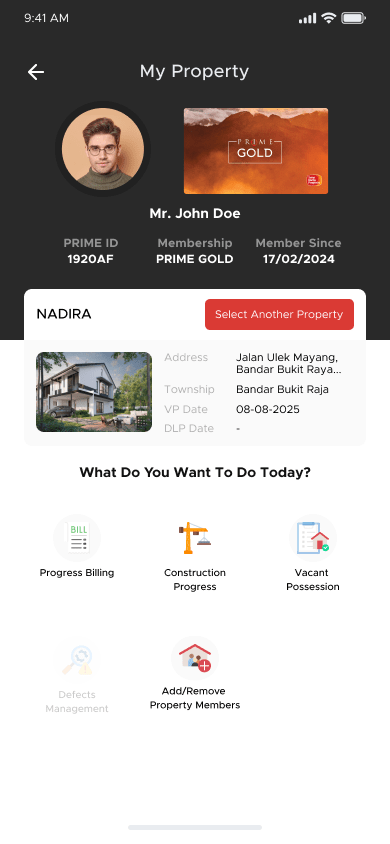
From My Property page, click “Progress Billing”
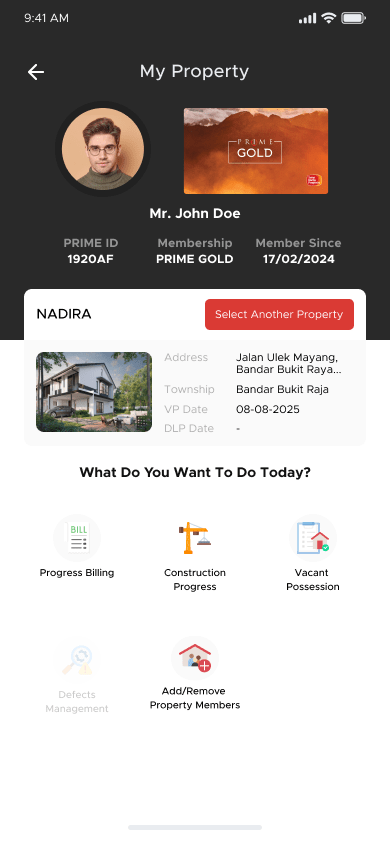
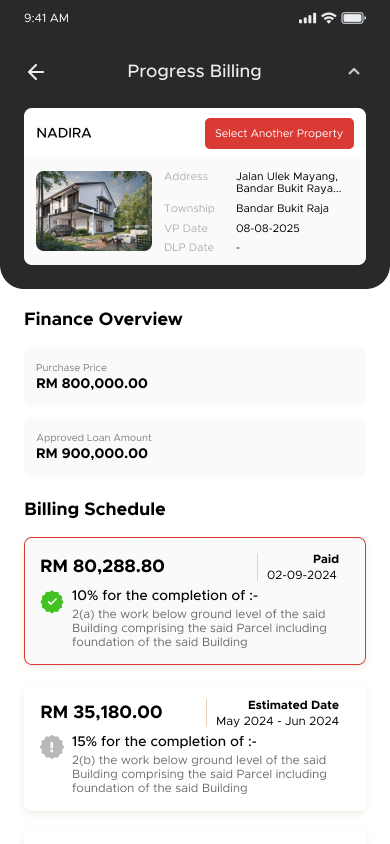
a.The User will be able to view the progress billing of chosen property accordingly.
Construction Progress
Objective: To view Construction Progress Page.
Step 1
From My property page, click “Construction Progress”
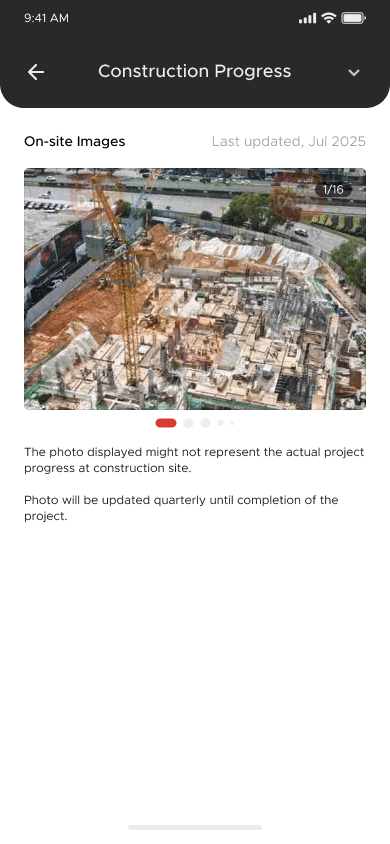
a.The User will be able to redirect and view the construction of the properties accordingly.
Vacant Possession
Objective: To access Vacant Possession Page.
Step 1
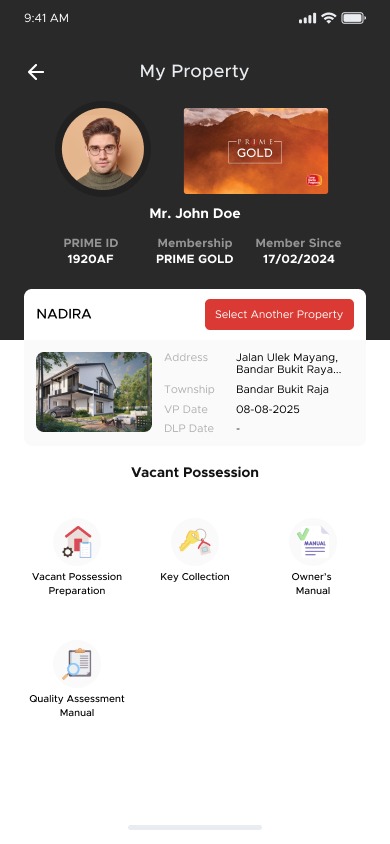
From My Property page, click “Vacant Possession”
a. The User will be able to redirect and view vacant possession menu accordingly.
b. User shall be able to watch the video accordingly
Vacant Possession Preparation
Objective: To access Vacant Possession Preparation Page.
Step 1
From Vacant possession Menu, “Vacant Possession Preparation”
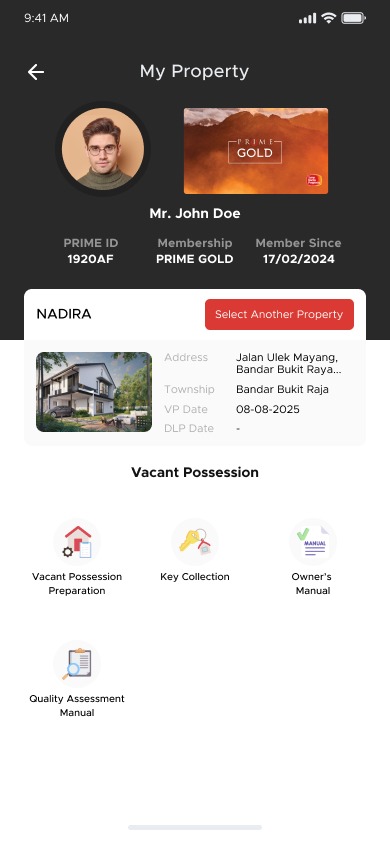
a. The User will be able to redirect and view vacant possession preparation page accordingly.
b. User shall be able to watch the video accordingly
Key Handover Appointment
Booking Appointment Page
Objective: To access Booking Appointment Page.
Step 1
From Vacant possession Menu, click “Key Handover Appointment”
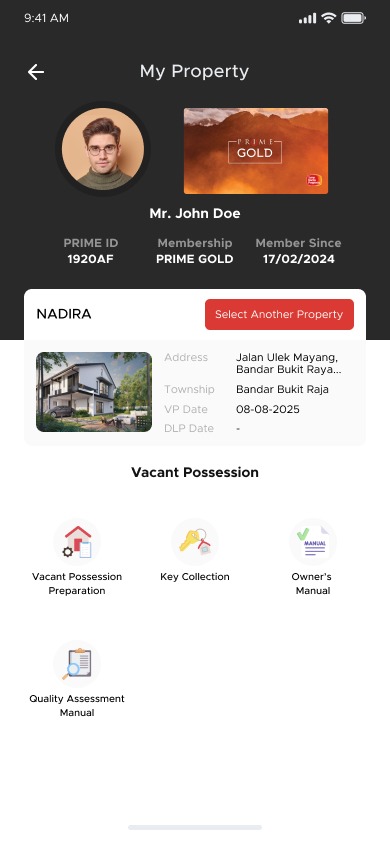
a. User will be redirected to the Booking Appointment page accordingly.
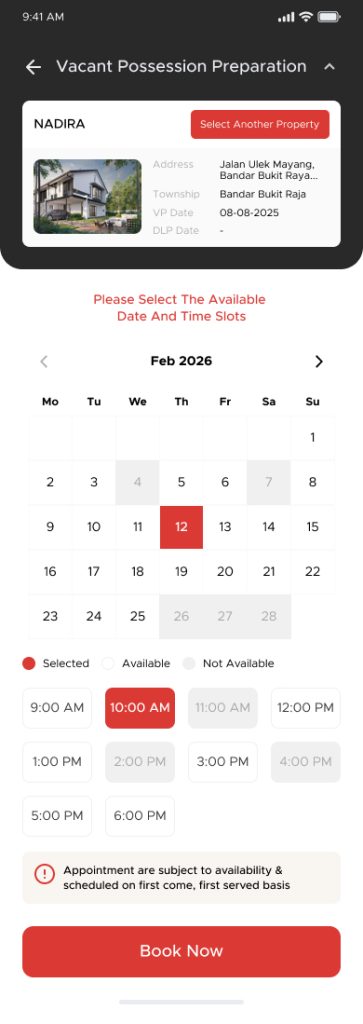
b. User shall select available date and time, the grey box labelled as unavailable date. User shall click [Book Now] after select the confirm date and time
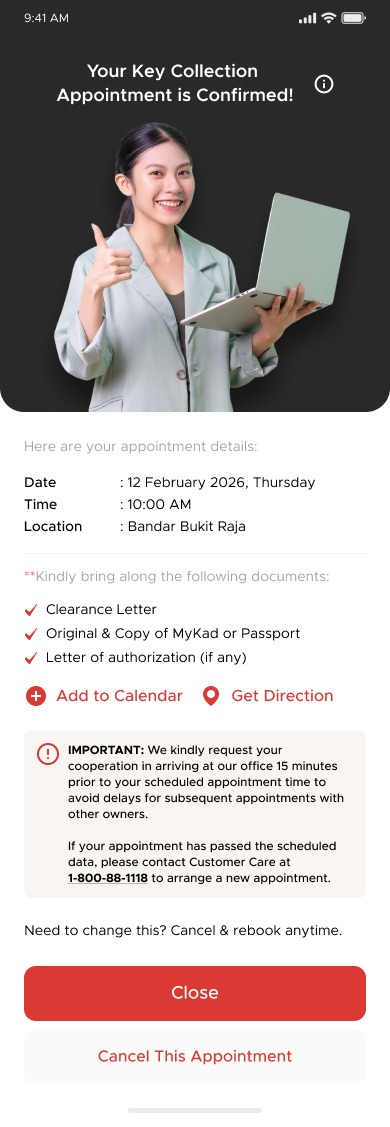
c. User has success with the booking appointment
Cancel Appointment Page
Objective: To cancel Booking Appointment Page.
Step 1
From Vacant possession Menu, click “Key Handover Appointment”
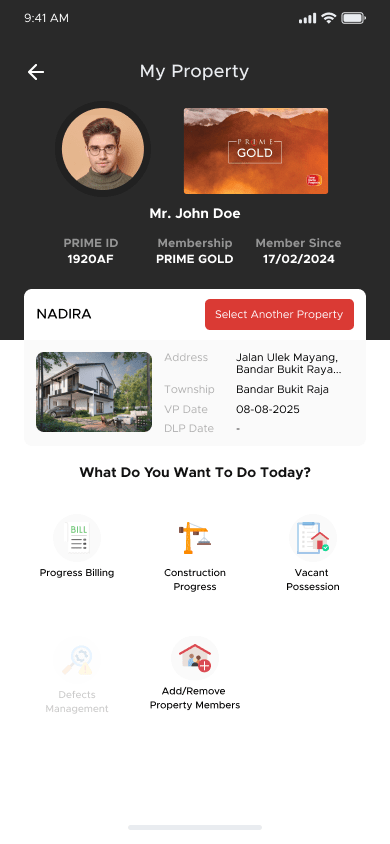
a. User will be redirected to the Booking Appointment page accordingly. If user has already made booking appointment for the property, user can cancel the appointment
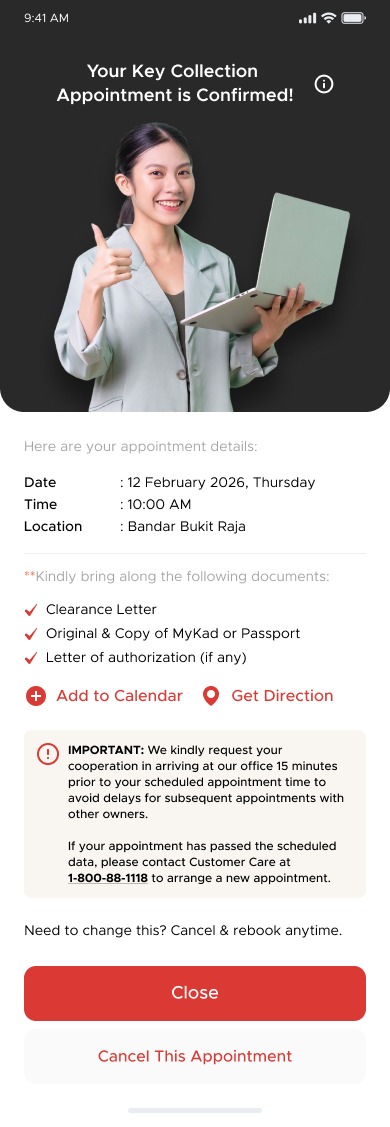
b. Click [Cancel This Appointment] to cancel the booking key handover appointmenta
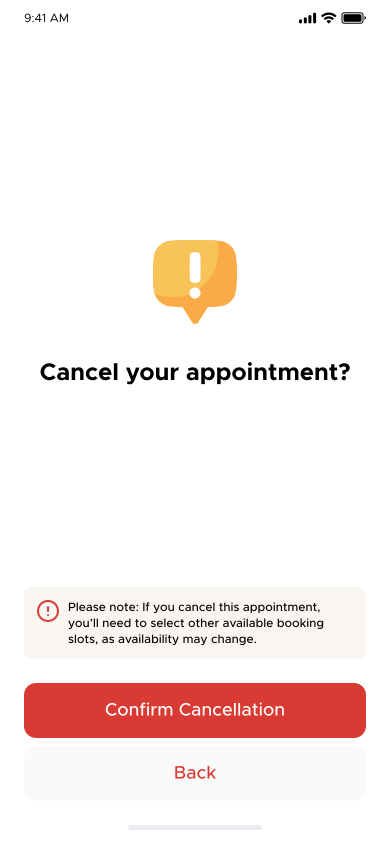
c. The pop-up of confirmation page appears to confirm the cancelation
d. Click [Yes, I Confirm] to proceed with the cancelation
e. Click [Cancel] to not proceed with the cancelation
f. If user click [Yes, I Confirm] , the cancelation of booking will cancel accordingly. Toast message booking has been cancelled appear
Owner Manual
Objective: User to access owner manual
Step 1
From Vacant possession Menu, click “Owner Manual”
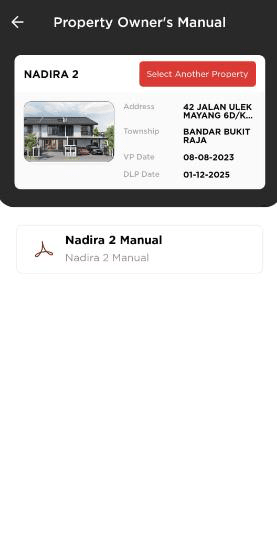
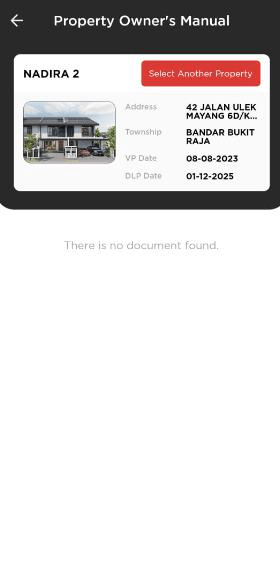
User will be redirected to the Property Owner’s Manual page, if there’s document available, it will display in the listing. Else, the listing will be empty.
Manage Property Members (Prime Dependent)
Owner to add member to property
Objective: Owner to add/view property members
Step 1
From My Property page, click on “Add/Remove Property Members”
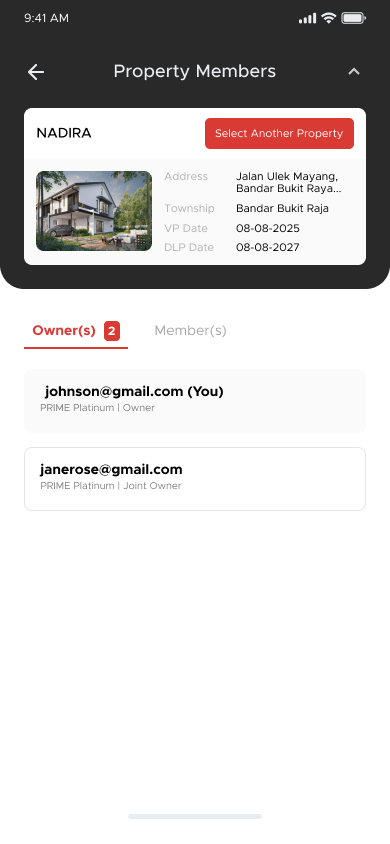
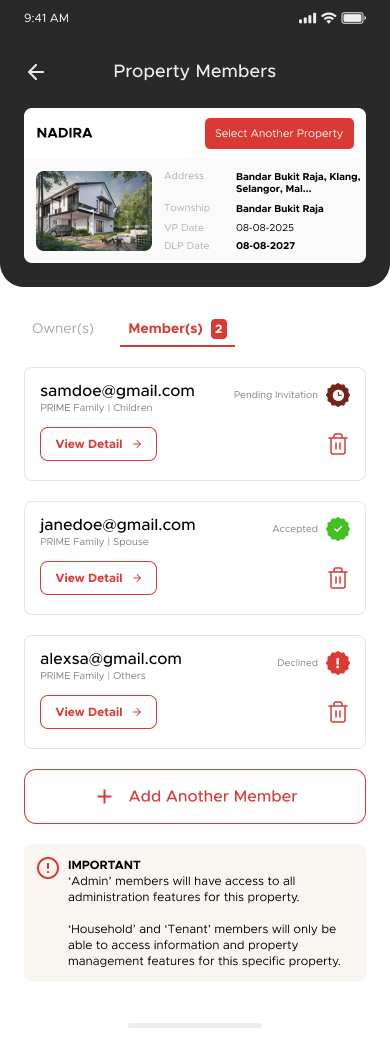
User will be redirected to Property Members page, with 2 tabs: Owner(s) and Member(s) displayed
a. Click on Owner(s) tab to view the owner list, or Member(s) tab to view member list
b. Click on “View Detail” button to view the member’s details, or click on trash can icon button to remove the member, or click on “Add Another Member” to add new member
Step 2. Click on “Add Another Member” button
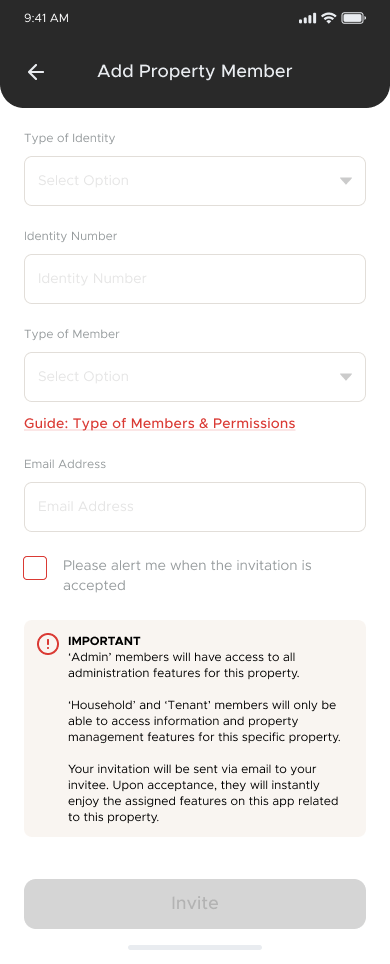
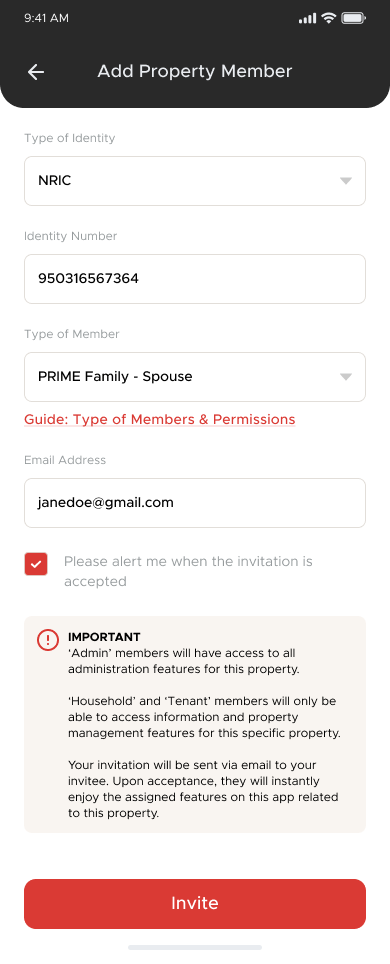
User will proceed to Add Property Member page 1. Fill in the member info and click on “Invite” button
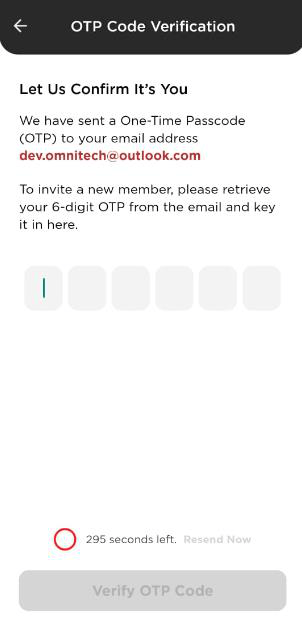
An OTP will be sent to owner’s email for verification, enter the OTP to verify. The OTP will be expired in 5 minutes, user can click on “Resend Now” button to resend the OTP.
Condition
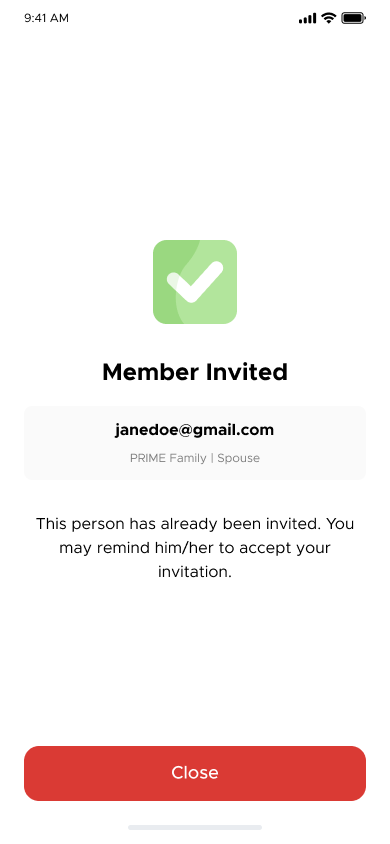
a. If the invitee is not under the member list, it will be a success invitation and owner will be able to view the success invitation message. Click on “Back To Homepage” to go to homepage or “View Property Members List” to view member list
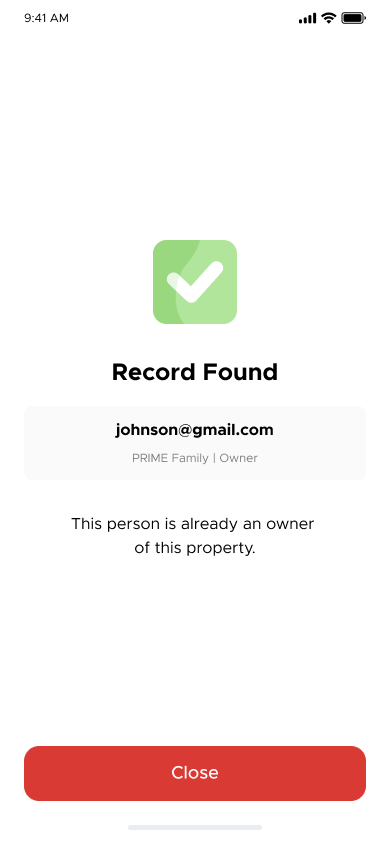
b. If the invitee was sent an invitation before and pending for accepting invitation/ activating account, the above message will be displayed to owner, and this invitation will not be completed.
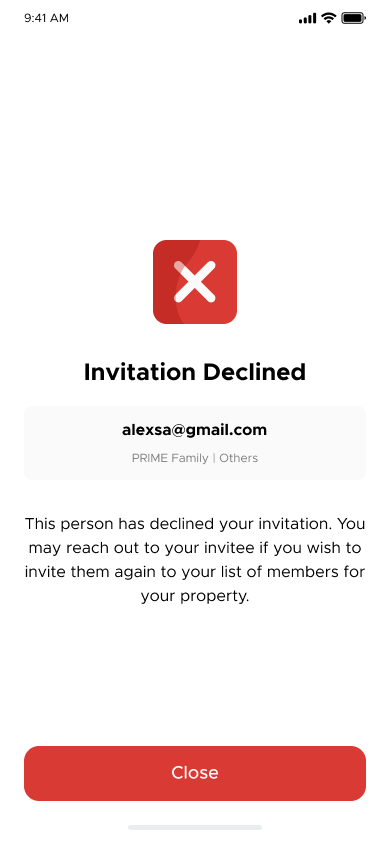
c. If the invitee declined the invitation, the above message will be displayed to owner
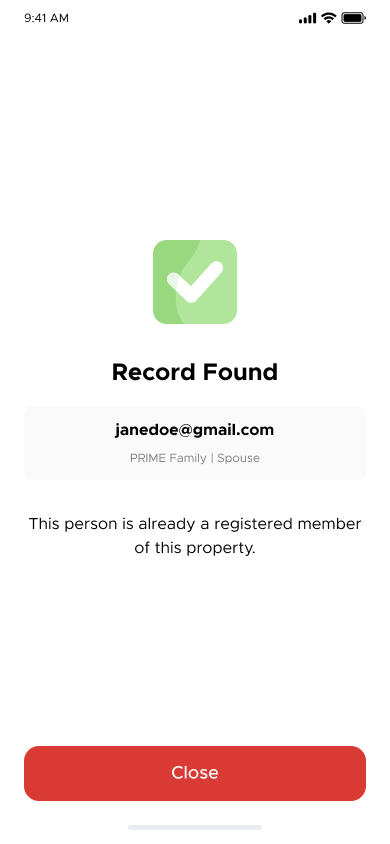
d. If the invitee is already an existing member of this property, the above message will be displayed to owner
New member to accept and activate the account
Objective: New member to accept invitation and activate account
Step 1
On the login page, click on “Login as Family Member” button to activate
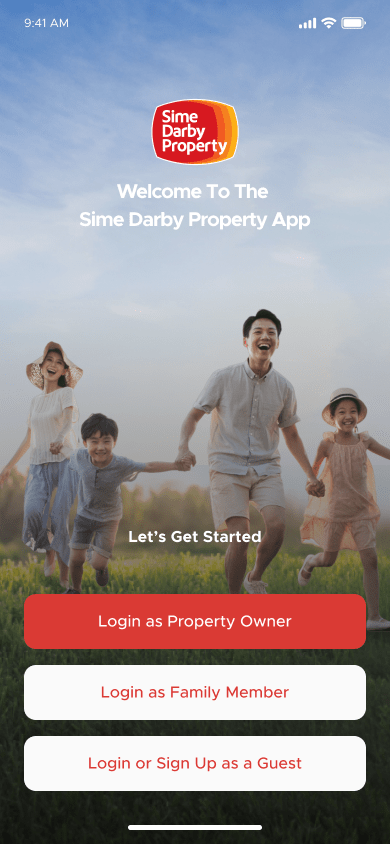
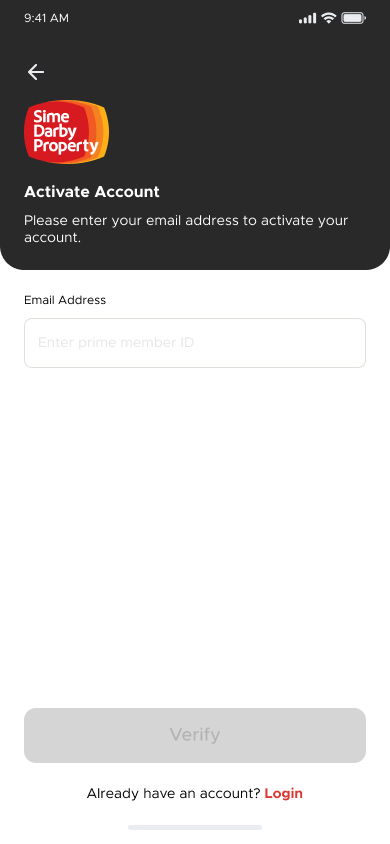
a. User will be asked to enter email to activate account
b. After successfully verify, user will be able to login and access the available features
Registered user to accept/decline invitation
Objective: New member to accept invitation and activate account
Step 1
From inbox, click on the invitation message
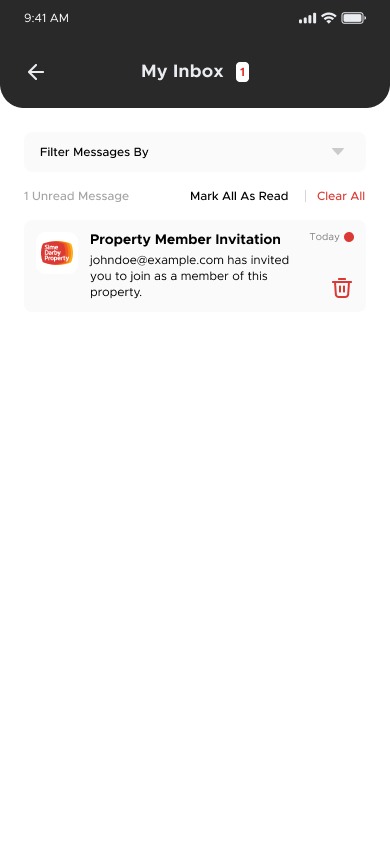
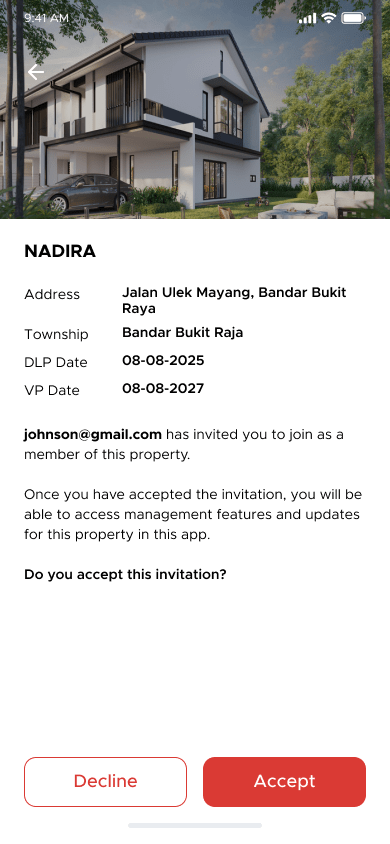
a. User will be redirected to the invitation page, click on “Accept” button to accept the invitation or “Decline” button to decline the invitation
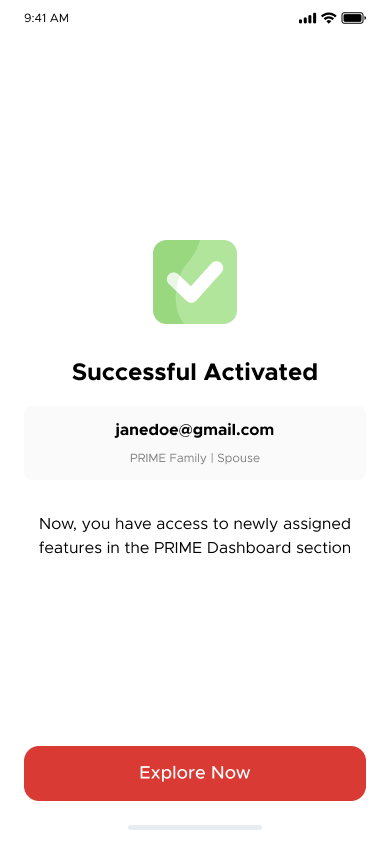
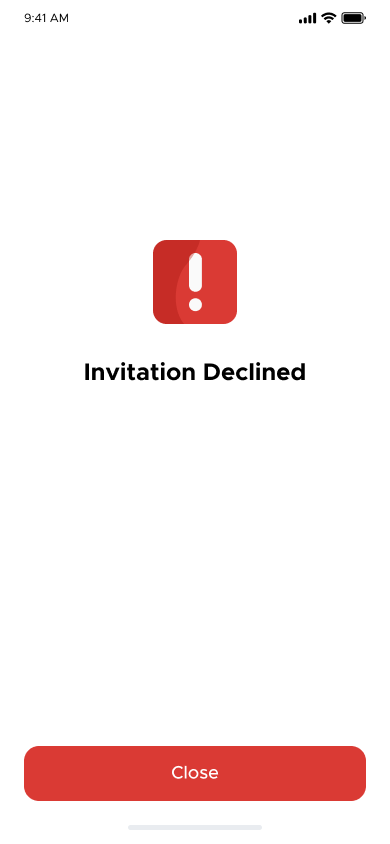
b. User will be able to view the above message upon accepting or declining the invitation
Defect Submission
Online defect submission
Objective: To submit/view defect
Step 1
From Homepage, click “My Property”
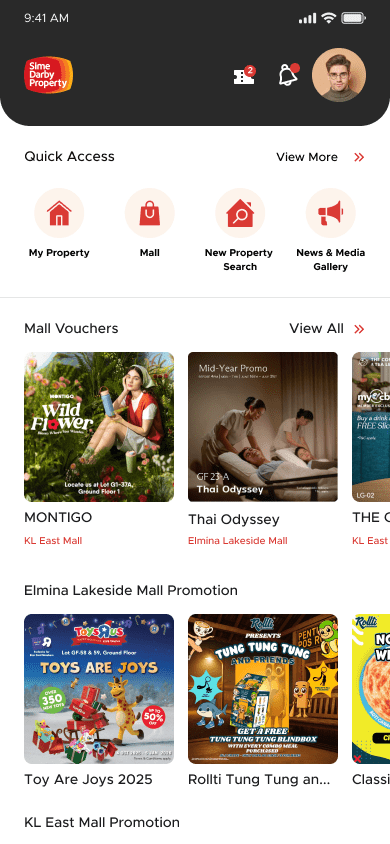
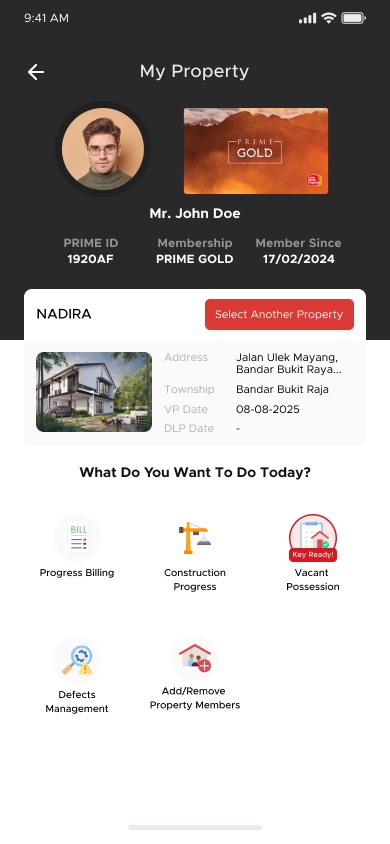
User will be redirected to My Property page.
Step 2
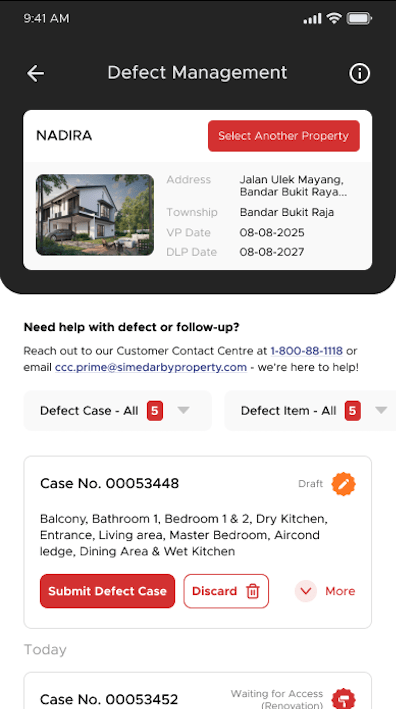
From My Property page, click on “Defects Management”
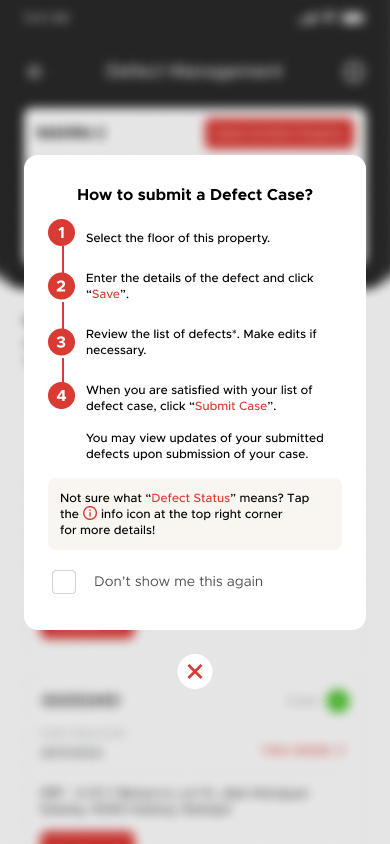
The How to submit a defect case pop-up will appear.
a. User can click “X” to close and go to defect management page.
b. User can tick “Don’t show me this again” if do not want this pop-up to appear again when open defects management.
Step 3
Click on “Select Another Property” button if user want to change to another property that user has
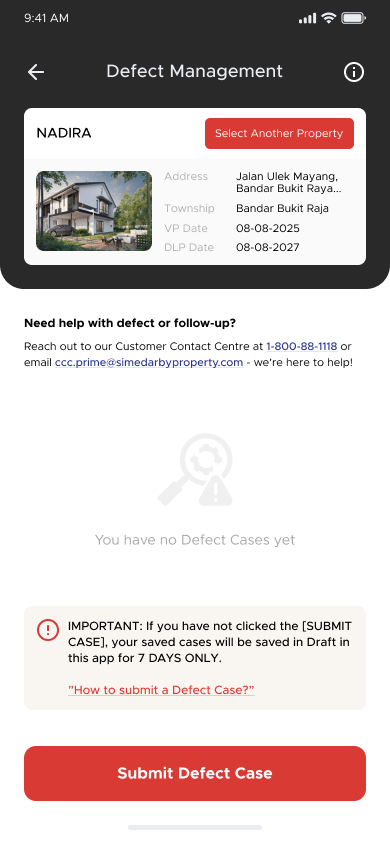
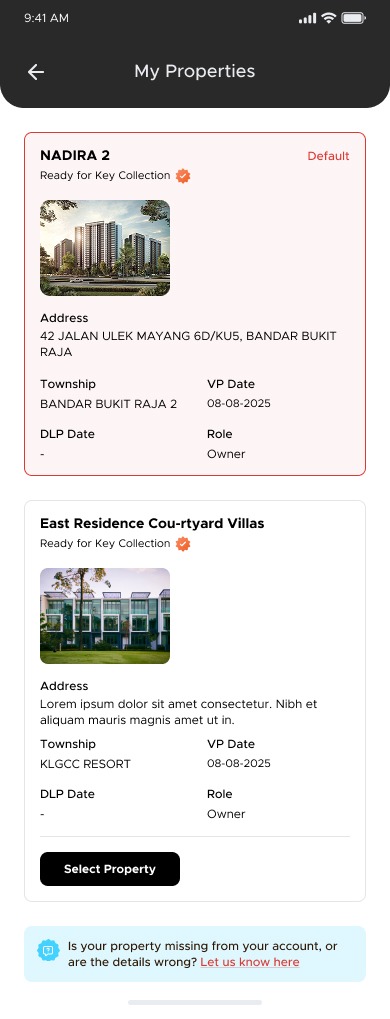
The list of property will appear.
a. User can click “Select Property” to choose the property
b. Click a back “arrow” button at the top to go back to the defect management page
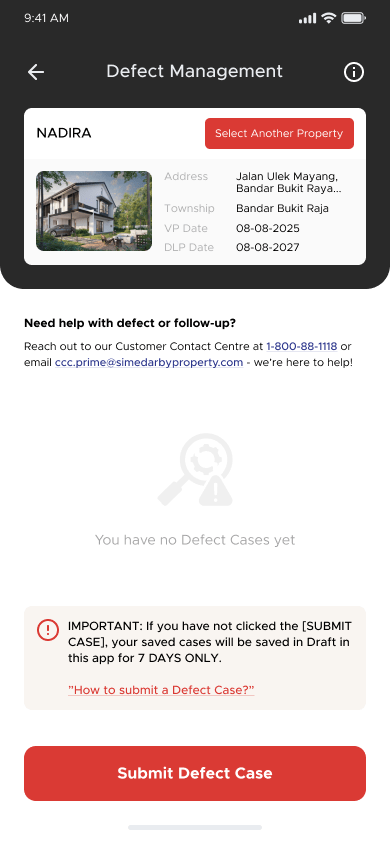
Step 4
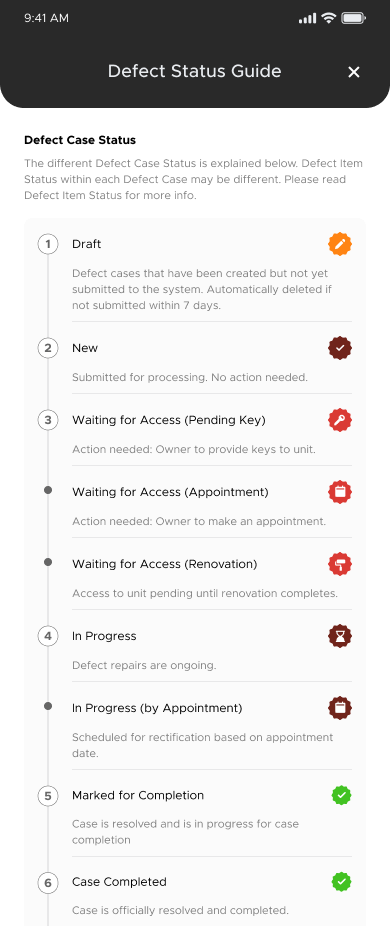
Click the “i” icon at the top to view the status guide
User will redirect to the Defect Status Guide page. User can view the Defect Case Status and Defect Item Status accordingly.
Step 5. Click “Submit Defect Case” button to submit new defect
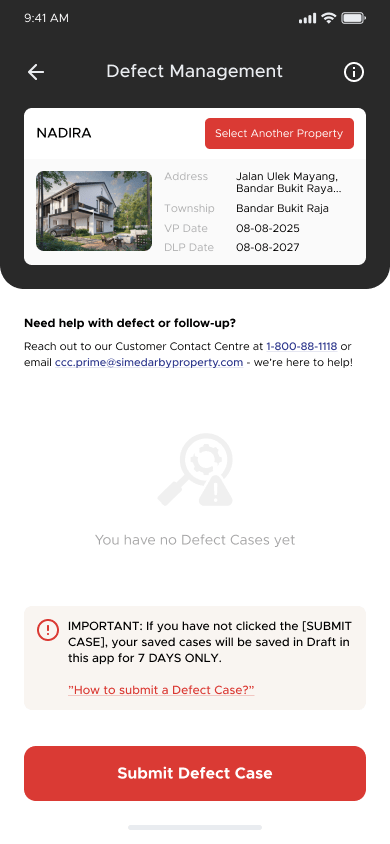
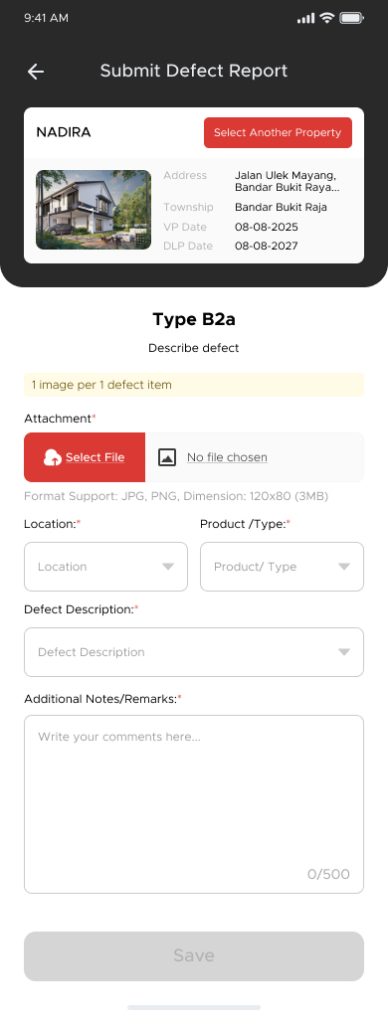
a. User go to the submit defect report page.
b. Fill in the defect info: Attachment, Location, Product/Type, Defect Description and Additional notes/remarks.
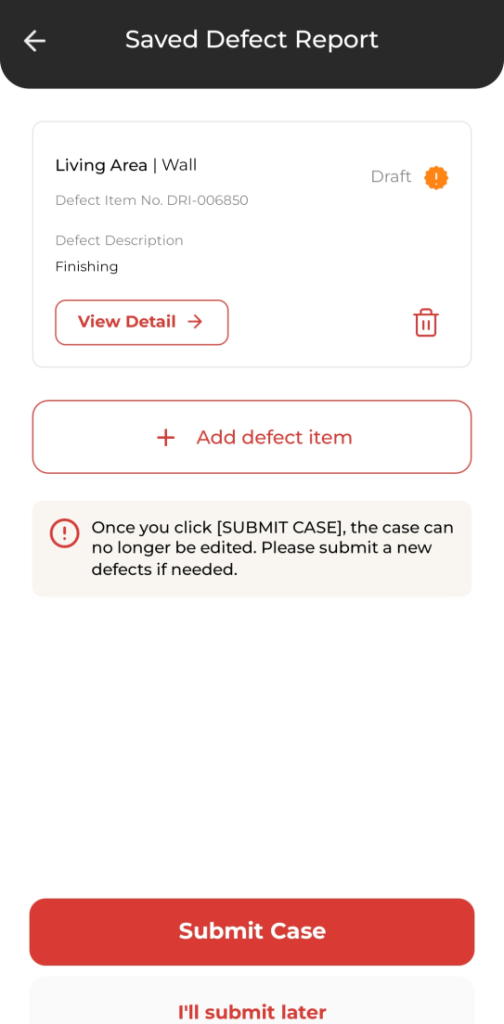
c. Then, click on “Save” button, user redirect to the Saved Defect Report page.
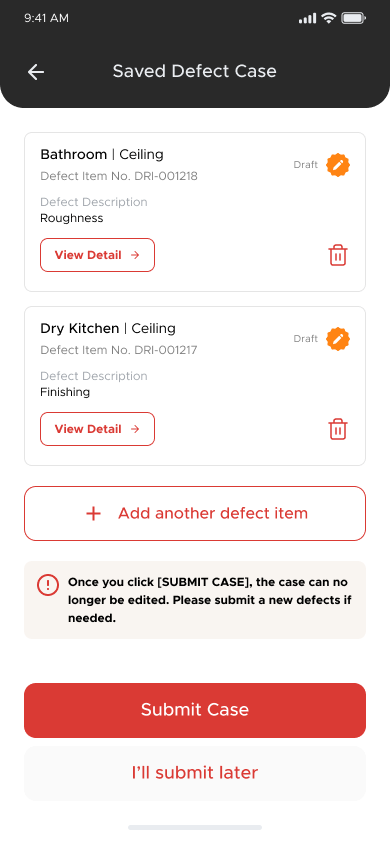
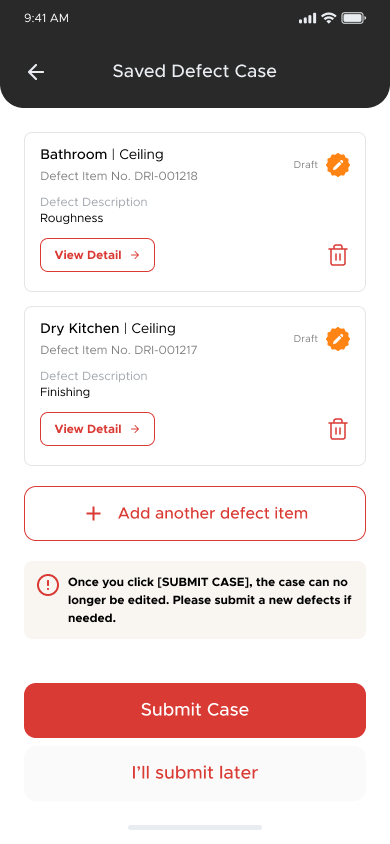
d. User will be redirected to Saved Defect Report page, click on “+Add defect item” to add more defect (if any)
e. Click on “Submit Case” button to submit the defect report, or click on “I’ll submit later” button to keep the defect report as draft
Step 3. Click on “I’ll submit later” button
The confirmation page appears to confirm to save as draft
a. Click “Yes, Save as Draft” to continue save it as draft
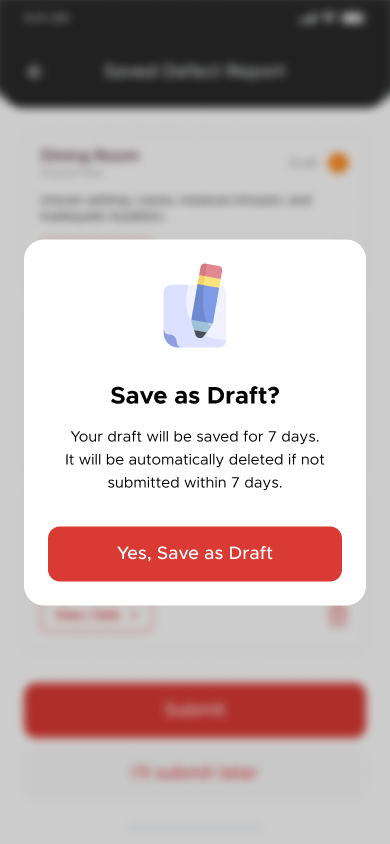
b. Click “Cancel” to go back to the Saved defect report page
c. After saving the defect as draft, user will be redirected to the defect case list page, with list of defect reports. The newly saved defect report will display the “Draft” icon status
Step 4. Click on “Submit Case” button
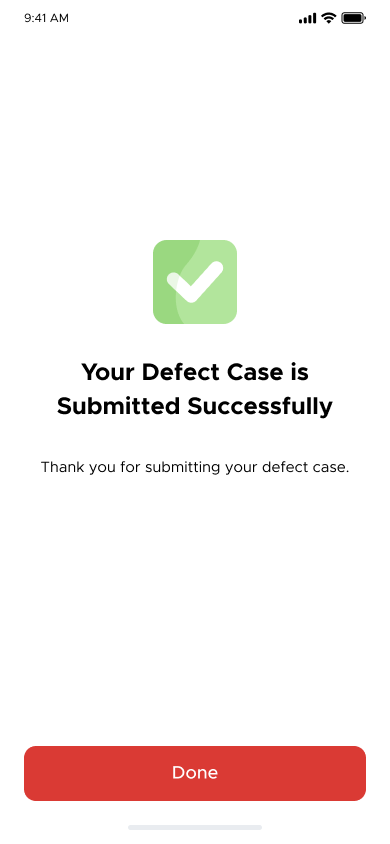
a. User will be able to view a defect report submission success message, click on “Done” button
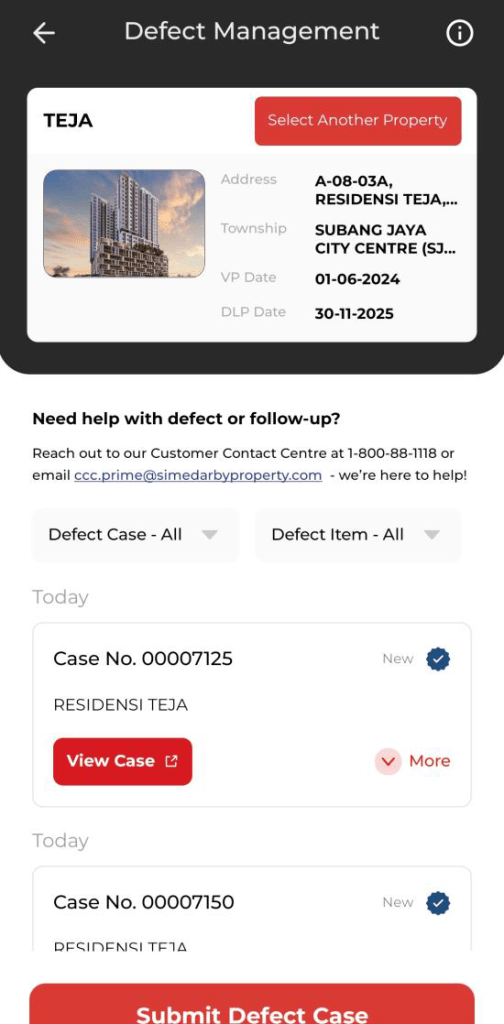
b. User will be redirected to the defect case list page, with list of defect case. The newly submitted defect case will display the “New” icon status
Step 5. Click on “Submit Defect Case” for the Defect Case with “Draft” status to add defect item or submit it
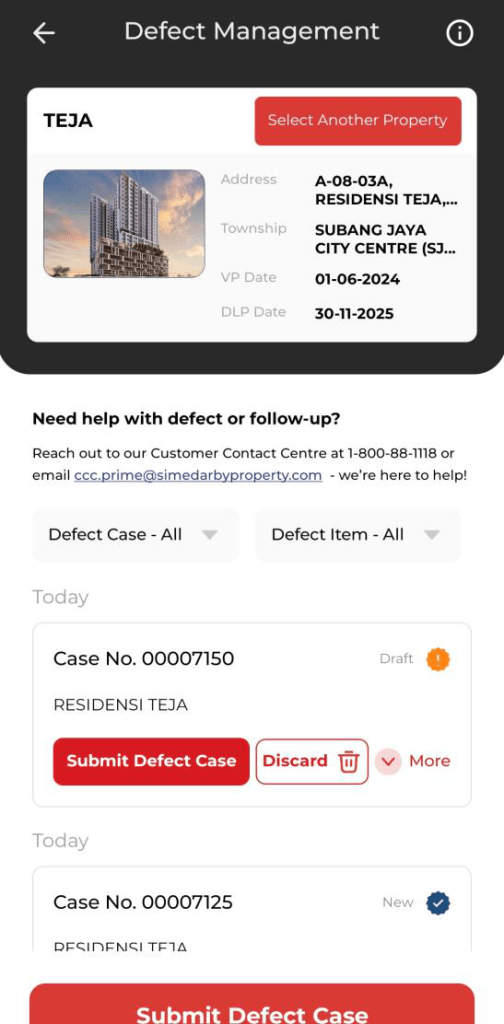
User will redirect to the Saved Defect Report page
- User can add the defect item
- User click “Submit Case” if want to submit
- click “I’ll submit later” if want to continue save as draft
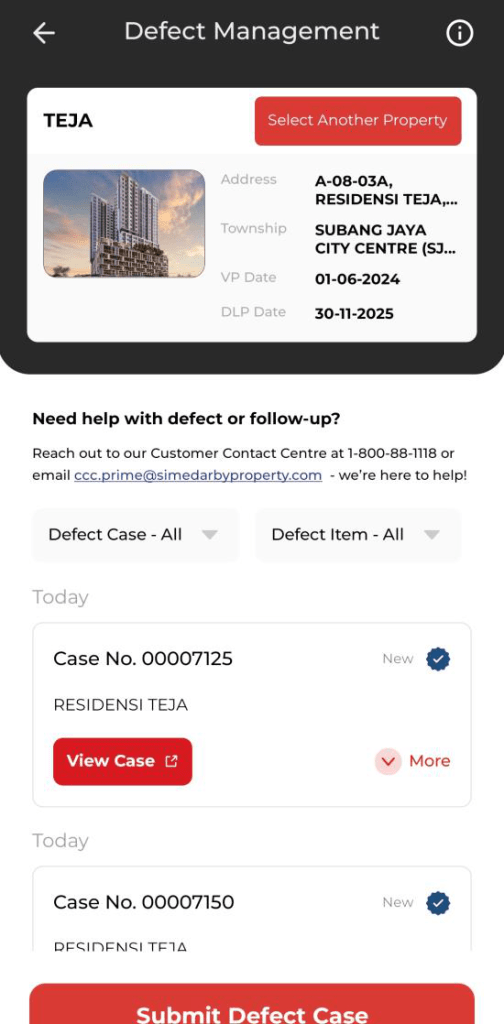
Step 6. Click “View Case” at the defect case
User will open up the pdf file of the defect report
Step 7. Click “More” button to view defect item list
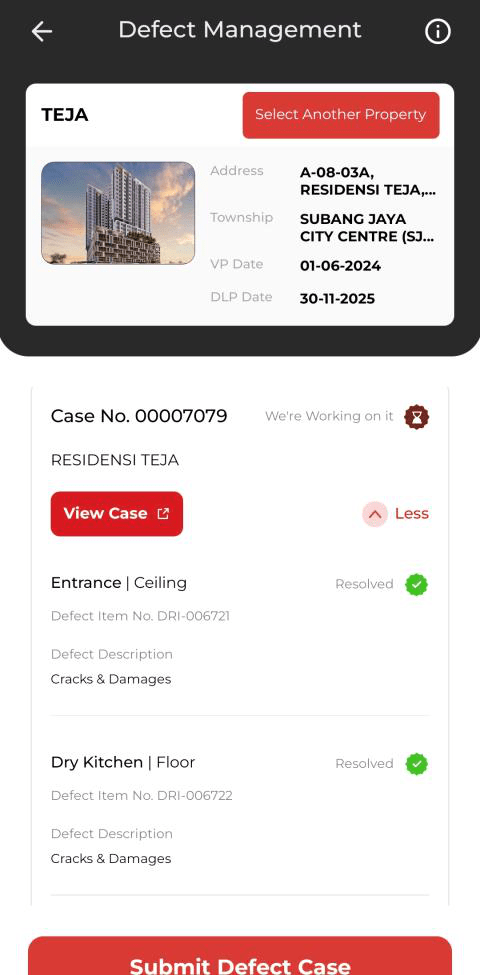
User can click each defect item and will redirect to the Defect detail page
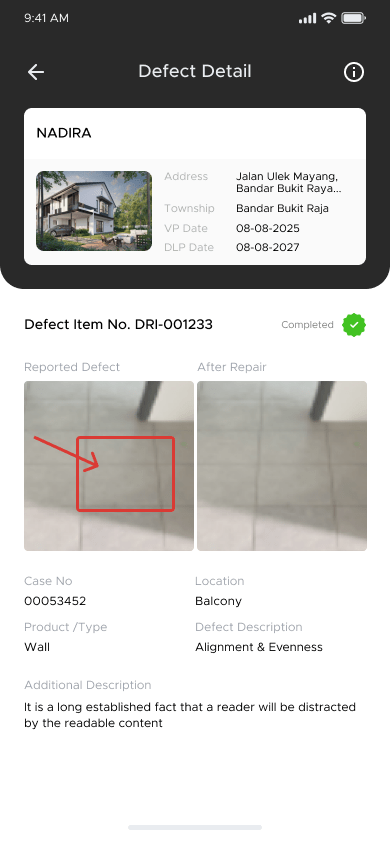
Step 8. Filter
User can filter the defect by:
a. Defect Case
b. Defect Item
c. Location
Offline defect submission
Objective: To submit/view defect without internet connection
Step 1
From homepage, click on “Take Me To Defect Submission” button
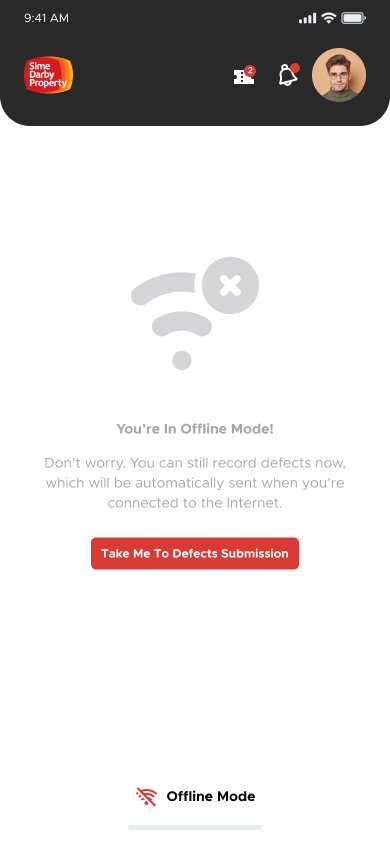
User will be redirected to Defect Management page
a. Click on “Submit Defect” button to proceed to submit defect
Step 2.
Click on “Submit Defects” button
a. User go to the submit defect report page.
b. Fill in the defect info: Attachment, Location, Product/Type, Defect Description and Additional notes/remarks.
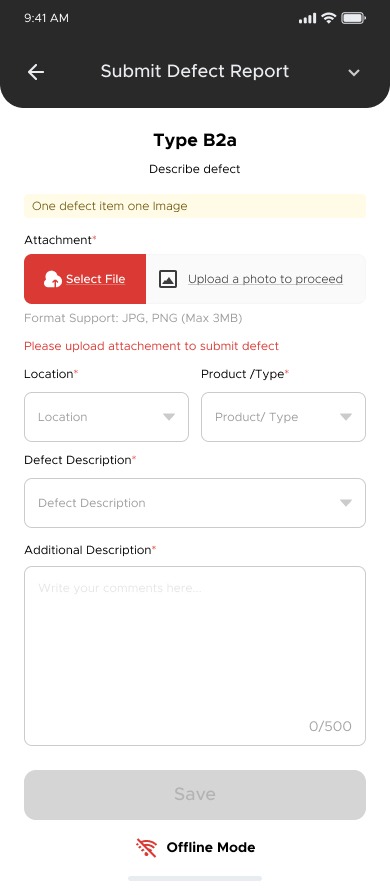
c. Then, click on “Save” button, user redirect to the Saved Defect Report page.
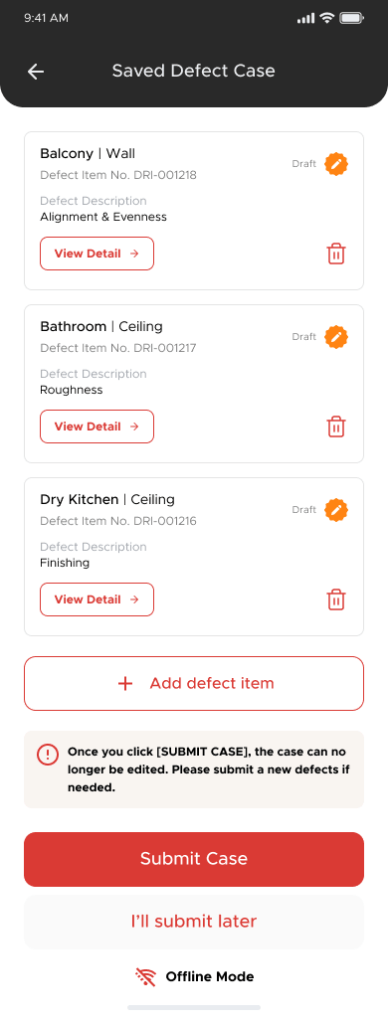
d. User will be redirected to Saved Defect Report page, click on “+Add defect item” to add more item (if any)
e. Click on “Submit Case” to submit the defect report, or click on “I’ll submit later” to keep the defect as draft
Step 3
Click on “I’ll submit later” button
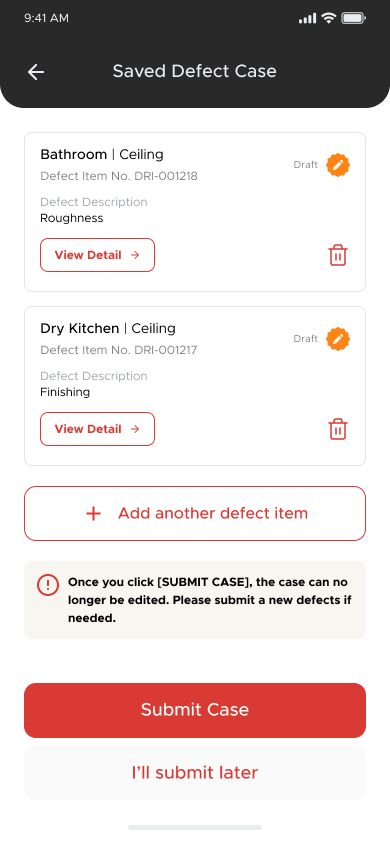
After saving the defect report as draft, user will be redirected to the defect case list page, with list of defect reports. The newly saved defect report will display the “Draft” icon status
Step 4
Click on “Submit Report” button
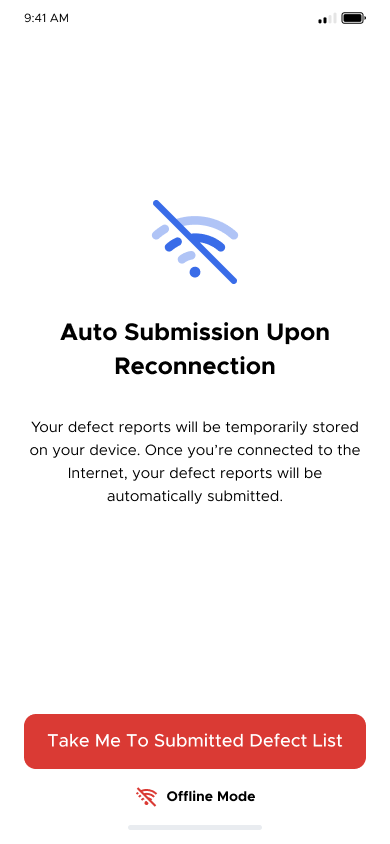
User will be able to view a message about auto submission upon reconnection of internet, click on “Take me to submitted defect list” button
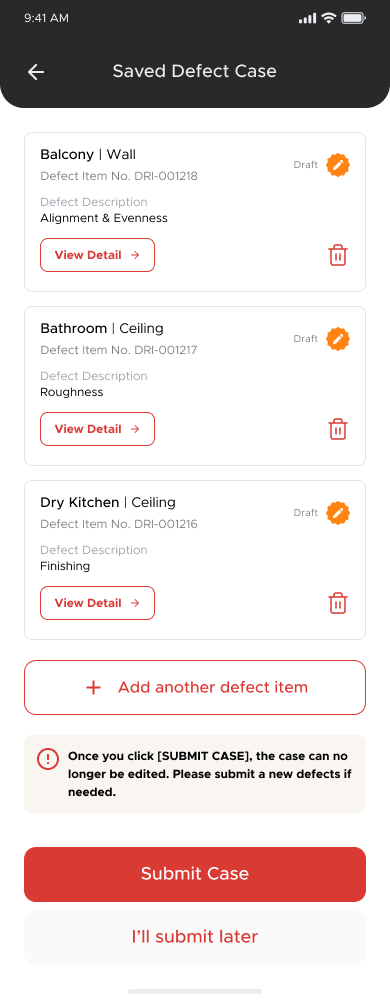
User will be redirected to the defect case list page, with list of defect reports. The newly submitted defect will display the “New” icon status
Step 5
Enable internet connection When enable internet connection and back to online mode, the app will synchronize the defect case listing, and any defect report submitted in offline mode will be auto submitted